
In this guide
- What handover actually means
- The four documents that must change hands
- Testing the lighting, channel by channel
- Keypads, scenes and curtains
- Cameras, sensors and storage
- Pull the router, cut the power
- Snag list, training and retention
- The 24-point handover checklist
- How Pert delivers it (designed, not DIY)
- FAQs
This guide sits alongside our wider coverage of home automation in Hyderabad. Our planning articles cover what to decide before work begins — reading the reflected ceiling plan, dimmer channels and lighting loads, reading the quotation. This one is about the other end of the project: proving that what was designed and paid for is what is actually working in your home, on the evening you take delivery of it.
What handover actually means
Three distinct milestones get collapsed into one word on most Indian residential projects, and separating them is half the battle:
- Installation — the hardware is physically in place and powered. Lights come on, keypads respond, curtains move. This is where a lot of projects stop.
- Commissioning — each device is configured against the design: dimming curves and minimum levels set per channel, curtain travel limits calibrated, scenes built and tuned in the finished room after dark, sensor timings and camera zones adjusted, engraved buttons mapped to the loads they name.
- Handover — the system is transferred to you: your accounts, your credentials, your documentation, a demonstration you actually participated in, an agreed snag list, and a warranty that has started.
Commissioning is the step that quietly disappears when a project runs late, because it is invisible on site — nothing new appears on a wall. It is also the step that decides whether the system feels premium or merely functional. A room where every channel fades smoothly to a matched warm level is the product of an hour of tuning; a room where the ambient channel snaps off at 8% is the same hardware without that hour.
Schedule the walkthrough at dusk, not at noon
Insist that the handover walkthrough begins about half an hour before sunset and runs into darkness, and that it takes place in the finished, furnished home rather than an empty shell. Daylight hides flicker, hides colour mismatch between fixtures, hides glare from a badly aimed spot and makes every scene look approximately correct. Budget ninety minutes to two hours for a 3BHK and half a day for a villa. Bring the original drawings, the quotation and a notepad, and have both decision-makers in the household present rather than one person who will have to relay everything later.
The four documents that must change hands
Ask for these in advance of the walkthrough, not on the day, so you can read them before you are standing in a room being shown things.
1. The as-built drawing set
Not the design drawing — the marked-up version showing where things actually ended up. Fixtures move on site, a driver gets relocated because a duct was in the way, an access panel shifts a metre. The as-built should show every fixture position, cove route, curtain track and motor end, keypad box, sensor, camera, driver location and access panel. Three years from now, when a driver fails, this drawing is the difference between a technician lifting one panel and a technician opening four.
2. The channel and circuit schedule
A table of every dimmer or switching channel: what it drives, in which room, its measured connected load in watts (not the design estimate), the dimming protocol, and the keypad button assigned to it. Reconcile this against your quotation — the number of dimmer modules you were charged for should equal the number in the house. Reconcile it against the design too: if ambient, cove and accent were meant to be three channels in the living room and the schedule shows two, a layer has been ganged and you have lost a scene capability you paid for.
3. The device inventory
Make, model, serial number and location for every fixture, driver, motor, keypad, sensor, camera, controller and network device, with MAC addresses for anything on the network. Add the fixture batch or bin code if you can get it, and ask for two or three spare fixtures per type from the same production batch to be left behind. LEDs from a batch bought eighteen months later will not colour-match the run they are replacing, and a single mismatched downlight in a straight line is remarkably hard to ignore once you have seen it.
4. Credentials, in your name
This one is regularly mishandled. The system, the app account, the camera recorder and the router should all be registered to your email and phone number, with passwords you set and know. An installer's account as the owner of your home means every future user change, every camera view and every reset depends on that person answering the phone. Ask for: your admin account, the router login, controller and recorder passwords, the Wi-Fi SSIDs and keys, and a written note of which devices sit on which network. Then change the passwords yourself, at the table, before the team leaves.
Testing the lighting, channel by channel
This is the longest part of the walkthrough and worth doing patiently. Work room by room and take each channel individually rather than running a scene, because a scene at 40% will never reveal what happens at 3%.
Sweep the full dimming range
Take each channel from 100% down through roughly 50, 25, 10, 5 and 1 percent, hold at each step for a few seconds, then bring it back up. You are looking for four specific faults:
- Drop-out or flicker near the bottom. Below about 10% is where a badly matched driver and dimmer betray themselves. A visible shimmer, a strobe on a phone camera in slow motion, or a fixture that simply switches off at 6% while its neighbours are still lit are all failures, not characteristics. Why this happens and what fixes it is covered in why LED lights flicker or buzz when dimmed.
- Audible buzz from either the fitting or the dimmer module in the distribution board — often loudest around 30–60%. In a quiet bedroom at night it is a permanent irritation.
- Uneven extinction across a group. If four of the six cove sections die at 8% and two hang on, the channel is below the driver's minimum load or the group is mixed. Minimum-load rules and how to group fixtures correctly are in how to plan dimmer channels and lighting loads.
- A jumpy curve. The fade should be smooth and perceptually even, with usable resolution at the low end where you will actually live — most evening scenes sit between 5% and 35%. A channel that goes from dark to obviously bright in two steps has not been curve-matched.
Check colour match and consistency
Set a whole run of downlights to one mid level and stand at the end of the line looking along it. Outliers reading pinker, greener or cooler than their neighbours mean the fixtures came from different bins or batches. Do the same with the tunable channels: drive a room from its warmest setting to its coolest and confirm every fitting in the group tracks together rather than one lagging behind. Then confirm the delivered colour temperatures actually match what was specified per room — our colour temperature guide covers what belongs where, and 4000K fittings quietly substituted into a 3000K bedroom is one of the more common substitutions.
Check aim, glare and the things you only see at night
Sit down. Lie on the bed. Sit at the dining table. From each of those positions, can you see the bright source of any fitting directly? Recessed anti-glare fittings should show you a lit surface, not a lamp. Adjustable spots should be aimed at the art or the stone wall they were specified for, tightened so they stay there, and not grazing a mirror where they will bounce straight into someone's eyes. Check the cove for hot spots, visible strip dots, or dark gaps at corners where a run was cut short, and check that corridor and staircase sensors trigger before you have walked past them and hold long enough to cross the space.
Keypads, scenes and curtains
Keypads
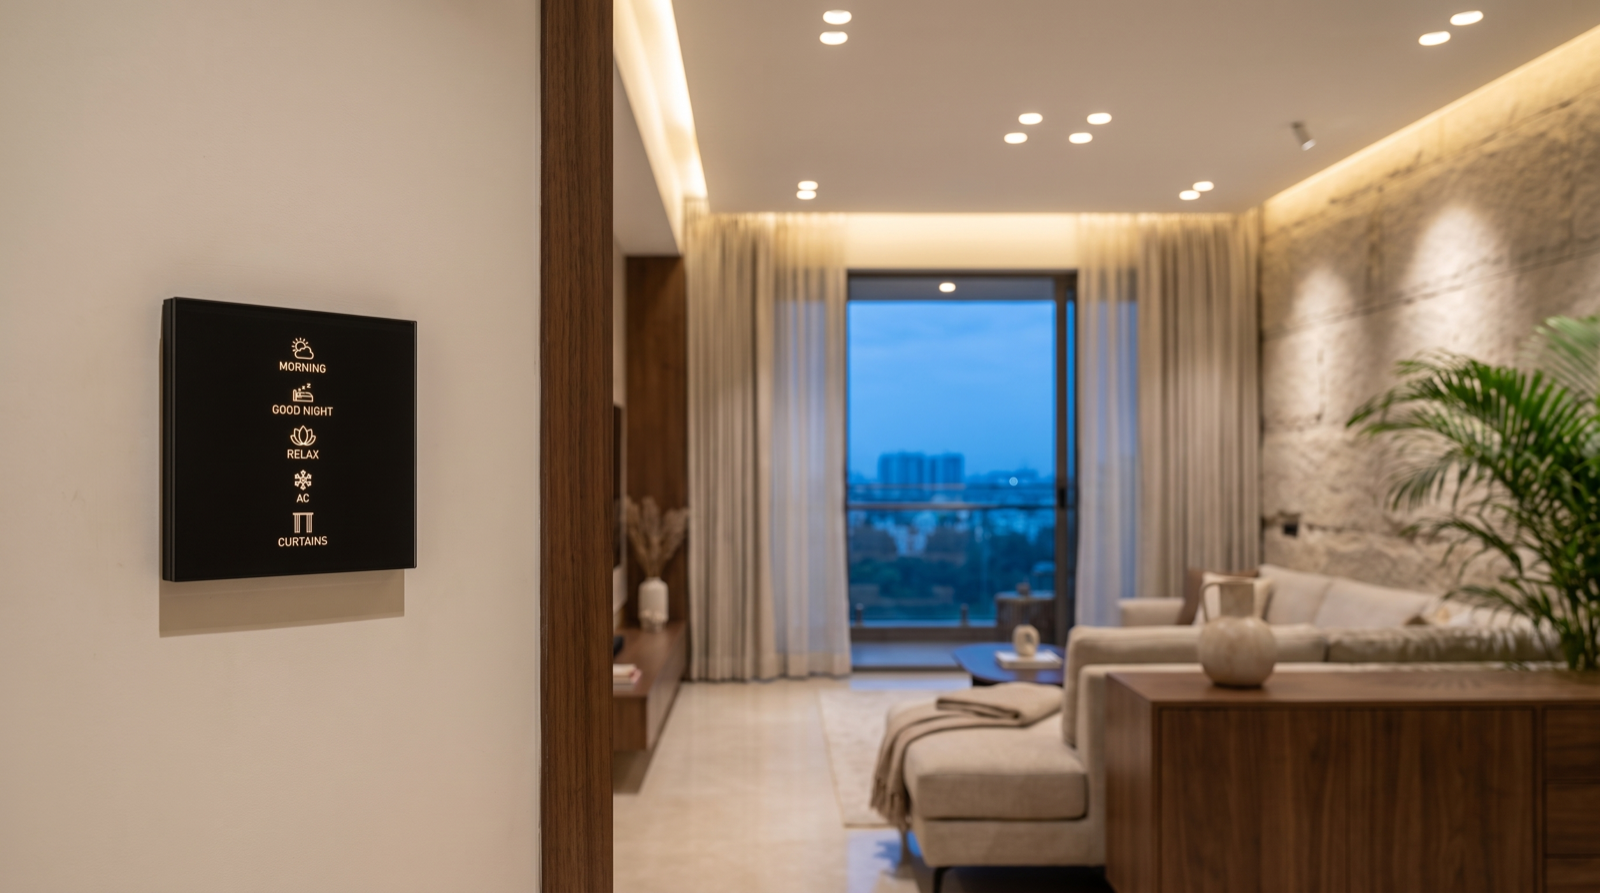
Walk to every keypad in the house and check the physical install first: flush to the wall, level, no gap at the edges, no plaster damage, at a consistent height across the home and not blocked by a door swing, a wardrobe or a curtain stack. Then test the function of every single button rather than a sample — press each one and confirm the load it operates matches the word engraved on it. This sounds trivial and is the single most common snag we find on other people's installations, because engraving is fabricated weeks before the wiring is finalised. Also check: press-and-hold behaviour if it was specified, backlight brightness at night (it should be readable, not a lantern in a dark bedroom), and response time — a keypad press should act immediately, not after a visible pause while a command goes to a server and back. How button lists and engraving are decided in the first place is in how to plan keypad layouts and engraving.
Scenes
Every scene should be run at the time of day it exists for. A Goodnight scene demonstrated at 4pm proves nothing; run it at 10pm and check that it genuinely takes everything down — including the balcony light, the corridor, the utility area and the bathroom mirror light that everyone forgets. For each scene confirm the fade time feels right (a 2–3 second fade for evening scenes, faster for a Cooking or Work scene), that no channel snaps rather than fades, and that leaving a scene and returning to it produces the same result twice. Our worked scene examples with real dim levels give you something concrete to compare against. Ask, too, how a scene is edited later — you should be able to adjust a level yourself without a service call.
Motorised curtains
Run every motorised curtain through at least five complete open-and-close cycles while you watch, and check:
- Travel limits. The fabric should stop cleanly at each end — not crash into the end stop, not stall short leaving a gap of light at the edge, and not bunch against the wall.
- Centre overlap. A centre-opening pair should overlap by roughly 30–50mm when closed, so there is no bright vertical slit down the middle at 6am.
- Sheer and blackout layers operate independently, on their own channels and their own buttons, and neither fouls the other on its track.
- Noise and smoothness. A quality motor on a well-aligned track is a soft hum, not a grind or a judder; a rough run usually means an unlevel track or a bracket under stress, and it will get worse.
- Obstruction and manual behaviour. Confirm what happens if a curtain meets resistance, and whether a gentle hand pull is tolerated — family members will do it regardless.
If the tracks or motors themselves were part of the scope, the selection logic behind them is in how to measure windows and choose tracks and motors.
Cameras, sensors and storage
Security devices get installed quickly and verified almost never. Sit with the recorder or app open and go through each camera on the security system:
- Field of view against the plan. Does each camera actually see the approach it was placed for — the gate, the main door, the parking, the utility balcony? Have someone walk the approach while you watch the feed, and check they are identifiable rather than a distant shape.
- Night performance. Look at every camera again after dark. IR wash on a nearby wall, glare from a security light in frame, or a lens washed out by a downlight one metre away are all fixable now and annoying forever if not.
- Motion zones and notification latency. Trigger each zone and time how long the alert takes to arrive on the phone. Confirm the zones exclude the road, a swaying plant and the neighbour's gate, or you will mute the app within a week.
- Storage and retention. Ask for the arithmetic: at the configured resolution, frame rate and bitrate, how many days of continuous or event recording does the installed drive actually hold? Get the number in writing, confirm it against the drive that is physically in the box, and check that recording is running rather than merely configured.
- Door, window and smoke sensors each triggered individually and confirmed to name the correct room in the alert.
The placement reasoning behind all of this — heights, angles, coverage and storage sizing — is in how to plan camera and sensor placement at home.
Pull the router, cut the power
Two deliberate failures, five minutes, and they tell you more about the quality of the system than an hour of demonstration.
Test 1: unplug the internet
Pull the WAN cable from the router and then walk the house pressing keypads. Lighting, curtains and scenes must all continue to work — those commands should execute locally and never round-trip to a cloud server. What is expected to stop is remote access from outside the home, voice assistants and push notifications. If a wall keypad in your bedroom stops dimming your own ceiling because a fibre cable was cut two streets away, that is an architecture problem, not a bad day. This distinction is worked through in do smart homes work during power cuts and internet outages.
Test 2: kill the mains
Switch off at the distribution board, wait a minute, and switch back on while you watch the house. Check for:
- Nothing switching itself on at full brightness. A house that lights every room at 100% when supply returns at 3am is a nightly event in a city with the occasional outage.
- Curtains staying put rather than running a homing cycle.
- Keypad backlights returning to their configured night level.
- The controller and network back and responsive within about two minutes, with no device needing to be re-paired and no app login required.
If your home runs on an inverter or DG supply, repeat the test on that changeover too, and confirm which circuits are backed up. More on reliability expectations in Indian conditions is in is home automation reliable in India.
Snag list, training and retention
Write the snag list properly
Everything that fails a test goes onto one numbered list — not into a WhatsApp thread where item 7 is lost between two forwarded videos. Each row: number, room, description, a photograph, the responsible party, and a target close date. Share it as a single document, update the same document, and re-test each item yourself before it is ticked off. A 3BHK typically produces eight to fifteen genuine snags at first walkthrough, which is normal and not a sign of a bad contractor; a walkthrough that produces zero snags usually means the walkthrough was not thorough.
Insist on a real handover training session
Half an hour, everyone in the household who will use the system, plus whoever runs the house day to day. Cover: how to operate every scene from the keypad and the app; how to adjust a scene level yourself; how to add or remove a user and revoke access; how to set a curtain limit again if it drifts; where the drivers, controller and access panels are; what to do if one channel stops responding; and who to call, on what number, with what expected response time. Ask for it to be recorded on a phone — you will want it in eight months.
Retention, warranty and what starts today
A retention of about 5–10% of the project value held until the snag list is closed and countersigned is normal, and should have been written into the contract at order stage rather than proposed on handover day. At the same time, pin down in writing: the warranty period for fixtures, drivers, motors, keypads and controllers separately; whether labour is included or only parts; the promised response time for a service visit; what happens after the warranty period; and the date the annual maintenance arrangement begins. What good after-sales support actually looks like is covered in home automation maintenance and support in Hyderabad.
The 24-point handover checklist
Print this, take it round the house at dusk, and do not release the final payment until you have been through it.
- 1. Walkthrough scheduled at dusk, in the finished furnished home, with both decision-makers present.
- 2. As-built drawing set received, showing actual fixture, driver, motor, sensor, camera and access panel positions.
- 3. Channel schedule received, with measured connected load per channel and the keypad button assigned to each.
- 4. Channel count and module count reconciled against the quotation.
- 5. Layers not ganged — ambient, task, accent and cove each still on their own channel as designed.
- 6. Device inventory received: make, model, serial, MAC and location for every device.
- 7. Spare fixtures from the same production batch left behind, two to three per type.
- 8. System, app, recorder and router all registered to your email and phone; passwords changed by you before the team leaves.
- 9. Every dimmer channel swept 100 → 50 → 25 → 10 → 5 → 1% and back, with no flicker or drop-out.
- 10. No audible buzz from any fixture or dimmer module at any level.
- 11. All fixtures on a channel extinguish together — no group falling below minimum load.
- 12. Dimming curve smooth and usable at the low end where evening scenes live.
- 13. Colour match checked along every run; no pink, green or cool outliers; specified CCT delivered per room.
- 14. Tunable channels track together across the full warm-to-cool range.
- 15. No direct view of a lamp source from the sofa, the bed or the dining chair; accent spots aimed and locked.
- 16. Cove checked for hot spots, visible dots and dark corners.
- 17. Every keypad flush, level, at a consistent height and unobstructed.
- 18. Every keypad button pressed and confirmed to match its engraving; night backlight level correct; response immediate.
- 19. Every scene run at its real time of day, with correct fade times and nothing left on that should be off.
- 20. Every curtain cycled five times: clean limits, 30–50mm centre overlap, sheer and blackout independent, quiet and smooth.
- 21. Every camera checked by day and after dark for framing, glare and identifiability; motion zones tuned; alert latency timed; recording confirmed running and retention days stated in writing.
- 22. Internet unplugged — keypads, curtains and scenes still work locally.
- 23. Mains cut and restored — nothing self-illuminates, curtains stay put, system back within about two minutes with no re-pairing.
- 24. Numbered snag list agreed with dates, training session delivered and recorded, retention and warranty terms confirmed in writing.
If a large number of these cannot be demonstrated, the honest conclusion is that the system has been installed but not commissioned. Ask for a commissioning visit and a second walkthrough rather than accepting a promise to "fix it later" — attention is far cheaper to obtain before the final payment than after it.
How Pert delivers it — a designed solution, not a DIY kit
Pert is a solutions company: we design, install and commission. We do not drop a carton of devices at your door with a login and a link to a setup video. On the delivery side of a project that means a commissioning visit made deliberately after dark in the furnished home, where dimming curves and minimum levels are set per channel, curtain limits are calibrated on the actual fabric that was hung, sensor timings are adjusted to how the corridor is really walked, and every scene is tuned by eye in the room it belongs to rather than typed into a configuration file.
Handover then follows as its own appointment: as-built drawings, a channel schedule with measured loads, a device inventory, accounts created in your name, a training session for the household, a numbered snag list closed out in writing, and a warranty with a stated response time. The dimmable and tunable lighting, motorised curtains, wall keypads and security hardware are ours, so a fault has one owner and one phone number rather than three vendors pointing at each other. If you are still choosing a partner, our guide to the best home automation companies in Hyderabad is a good starting point — and asking a prospective company to show you their standard handover document pack tells you more about them than any showroom demonstration.
About to sign off on an installation — or living with one that was never properly commissioned? We take on commissioning and correction work on existing systems as well as full projects: channel-by-channel testing, dimming and scene tuning, curtain recalibration and a documented handover pack. Request a consultation →
Frequently asked questions
What should I receive at the handover of a home automation installation?
Four things: an as-built drawing set showing where every fixture, driver, motor, sensor, camera and access panel actually ended up; a channel schedule with the measured connected load and keypad button for each channel; a device inventory with models, serials and MAC addresses; and the system registered in your own account with your own passwords, plus spare batch-matched fixtures and a written warranty stating coverage, duration and response time.
How do I test dimming and lighting properly before signing off?
After dark, one channel at a time, from 100% down through 50, 25, 10, 5 and 1 percent and back. Watch for flicker or drop-out at the bottom, buzz from the fitting or the dimmer, some lamps in a group dying before others (a minimum-load problem), and a curve that jumps rather than fades. Then look along each run at one mid level for colour outliers, and confirm every button operates the load engraved on it.
How do I check that my smart home works during a power cut or internet outage?
Unplug the router's WAN cable and confirm that keypads, curtains and scenes still work locally — only remote access and voice should stop. Then switch the mains off and back on: nothing should come on at full brightness by itself, curtains should not re-home, keypad backlights should return to night level, and the system should be responsive again within about two minutes with no device re-pairing and no app login.
Should I hold back a payment until the snag list is closed?
Yes — a retention of roughly 5–10% released when the numbered snag list is closed and countersigned is normal practice, and it belongs in the contract at order stage rather than in an argument on handover day. Keep snags as one numbered document with photographs and target dates, re-test each item yourself, and use the same meeting to confirm when the warranty and maintenance clocks start.